
Photographing Birds in Flight: A Complete Guide
Photographing birds in flight is something that every bird photographer dream of. But unfortunately, not everyone has their dream shots because it takes a lot of patience and practice.
But don’t worry in this post, we will share a complete bird in flight photography guide for you. which can help you in your 2021 wildlife expedition.
Before going to dig deep into the guide, I just want to ask one question, Do you know what is really bird in flight.
So some of you might know, a bird or group of birds that are flying in the sky called birds in flight.
But as you know that the bird in flight is the most difficult form of bird photography.
So today, I will share my 7 years of experience and explain how you photograph birds in flight step by step.
3 Things that I often Follow while Photographing Birds In Flight
- Use the tripods/ bodypod
- Composition
- Camera settings for photographing birds in flight
Let me explain them in a brief.
Use of tripods/ Bodypod:
Before you even think about your setting, one of the important tips to follow is to use a tripod while capturing birds in flight.
But if you think, why do we really need to use a tripod?
Because if you are using a tripod or monopod then you will get a more sharp and crispy image. But if you don’t have a tripod then you can shoot with bodypod.
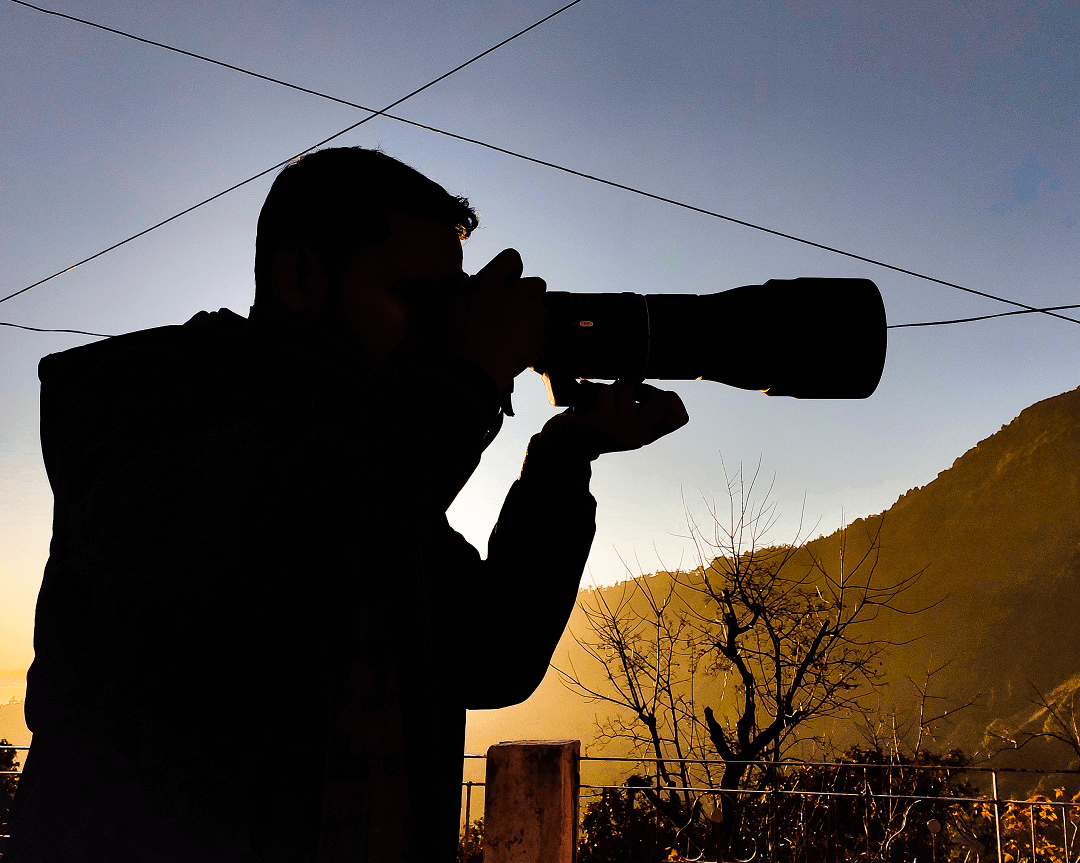
What is bodypod?
Bodypod is nothing but a technique of shooting without a tripod and getting good results. Shooting with bodypod is a bit of a challenge but if you follow the exact technique then you can get amazing results without a tripod.
- Firstly try to cup the lens perfectly so that the entire center of gravity rests on your hand and you are ready to take the next action
- Put your right leg forward and tuck it both the hand and pull the lens closer to your body so the hand should never be free. So this is basically the standing position
- Once you have got the standing position. You are ready to take shots of your beautiful bird and you focus on the subject and then the key is just at the time of shutter release Hold your breath so you can get complete stability with this technique.
So with bodypod technique, you can get the complete stabilized shots. For more reference please follow the below image of bodypod.
Camera settings for photographing birds in flight:
Once you have settled with your equipment to capture the perfect shots of birds in flight.
Now the camera settings come into play. but remember that there are not any perfect settings for perfect shots. But here are some of the camera settings that I have used while photographing birds in flight.
1. Shoot in AF-C or Continuous Mode:
I prefer to shoot in AF-C or continuous mode on Nikon (similar to AI Servo mode on Canon). When set to this mode, the camera continues to track and maintain focus on a moving subject as long as you keep the shutter button pressed halfway down. I also set the camera’s drive to High-Speed continuous shooting mode to capture the maximum number of shots. This produces images of birds in quick succession and you capture many more intimate moments.
2. Use Manual Exposure Mode:
I also use manual exposure mode when shooting birds against backgrounds of rapidly changing tonality. If you are in Aperture Priority mode and if the bird goes from being in the light sky to in front of dark trees, the metering will cause the shutter speed to drop, leaving the bird overexposed. However in manual exposure mode, as long as the light is constant on the bird, the exposure on the bird will be correct regardless of the background.
Conversely, I set the camera to Aperture Priority mode when the light is changing and the background is of uniform and constant tonality. This works well when shooting birds against an evenly lit sky or when the birds are not flying and the light is constantly changing.
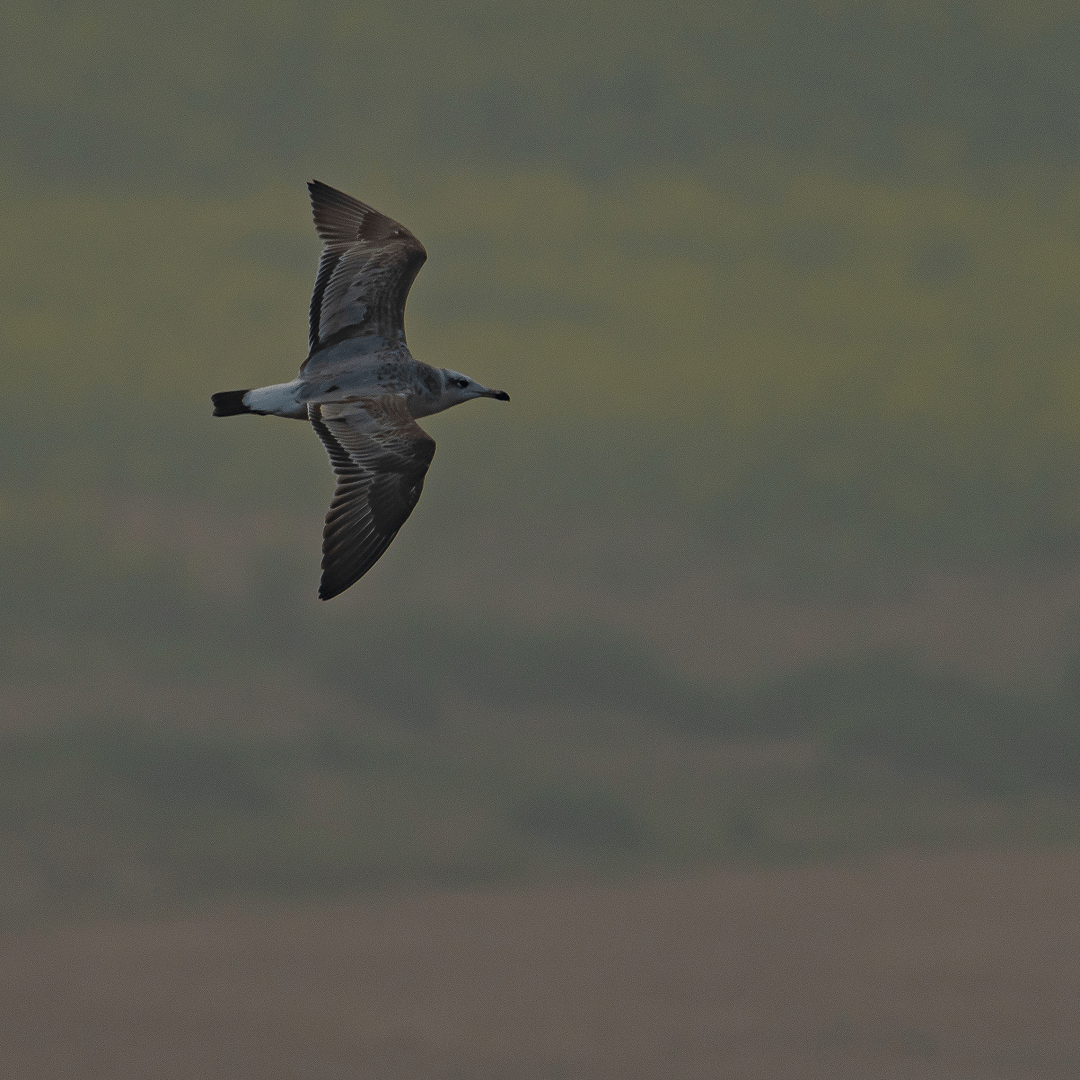
3. Use the Center Focus Points:
When first starting out in bird photography, I recommend that you use the center focus points to get the hang of tracking birds and shooting sharp images. As you improve your skills, start thinking about composition and choosing different focus points and focus settings. On Canon DSLR press the AF point selection button and, from the available options, choose the Expand AF Area with the four surrounding focus points activated (as seen in the image above). This works well for flight and action photography. On a Nikon DSLR, depending on the camera, you can choose to select the dynamic 9, 11, 21, 31, or 51 AF points, which work together. The 3D tracking on Nikon works well if the bird is against a solid background (clear blue sky).
4. Use Rule of Thumb for Photographing Birds in Flight:
As a rule of thumb, for freezing action or birds in flight, the shutter speed should be at least as much as the focal length of the lens. If you are shooting with a 600mm lens, it should be at 1/600sec or higher. A shutter speed in excess of 1/1250 sec is ideal. However for creative shooting and showing a sense of motion, shoot in manual mode and choose a slower shutter speed, and pan along as the bird goes by. Start by setting the ISO to a lower number and set the aperture to 1/30sec.
5. Use Back Button Focusing:
For advanced shooters, I recommend using a back button focusing setting on your camera. In this technique, you assign one of the back buttons (AF-ON) for focusing and leave the shutter button with only the task of taking the final image. Why use two fingers instead of one? When you use the shutter button for focusing as well as capturing the image, there is a higher possibility to let go of the shutter before the final capture. This can often happen with a fast-flying erratic bird which may cause you to experience some camera shake while panning. With the back button function, the focus is maintained even if you let go of the focus button.
Also Read: Best Camera for Wildlife Photography.
Composition for photographing Bird In Flight :
The composition is very important as well as a difficult aspect while photographing birds in flight.
But if you think why is it so important?
So, it is important because if you click a beautiful well-exposed photo. But when you capture the shot and see it the first time you think, I’ll fix this in post-processing. But when you process the image and see it, you might think this is not what I want.
Don’t worry, I have faced these Problems as a beginner. But now I have followed some techniques that give me great results.
So here are the techniques,
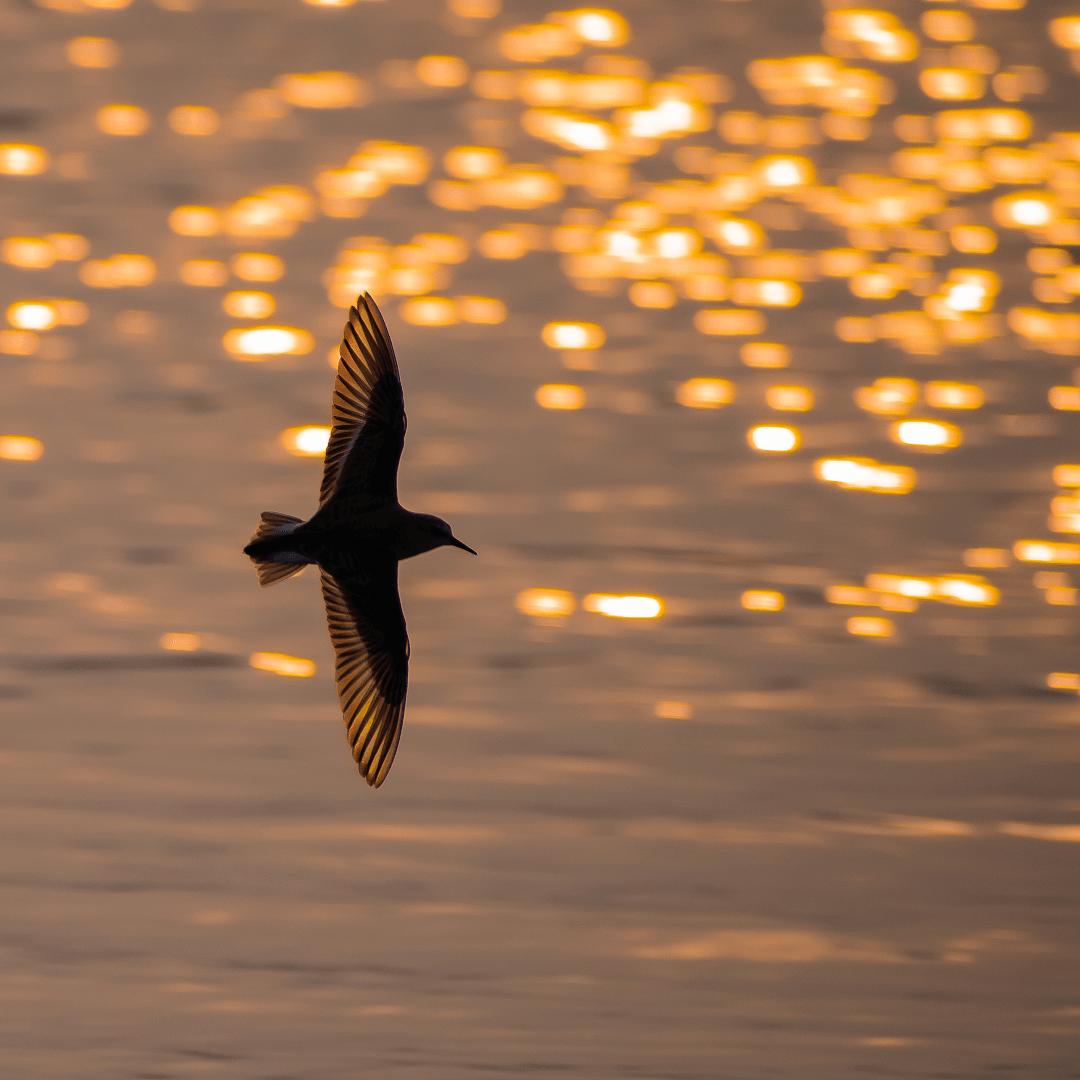
- Avoid putting the bird in the center of the frame. Use focus points to help place the bird off-center. Give the bird more space in the direction it is flying and think about the rule of thirds.
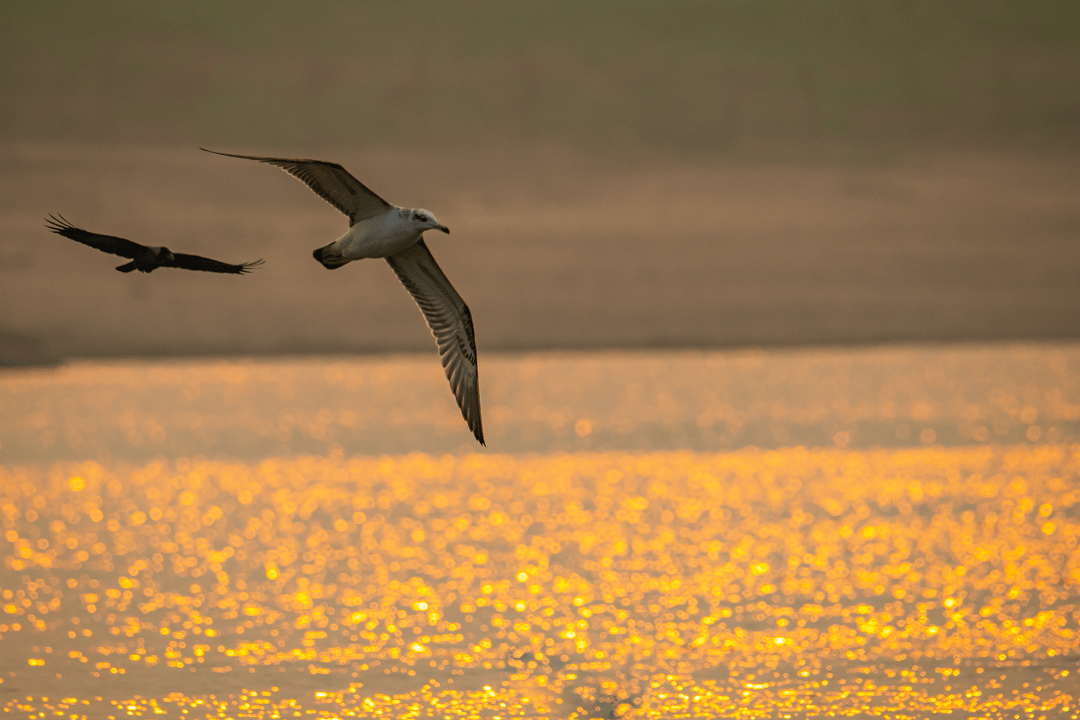
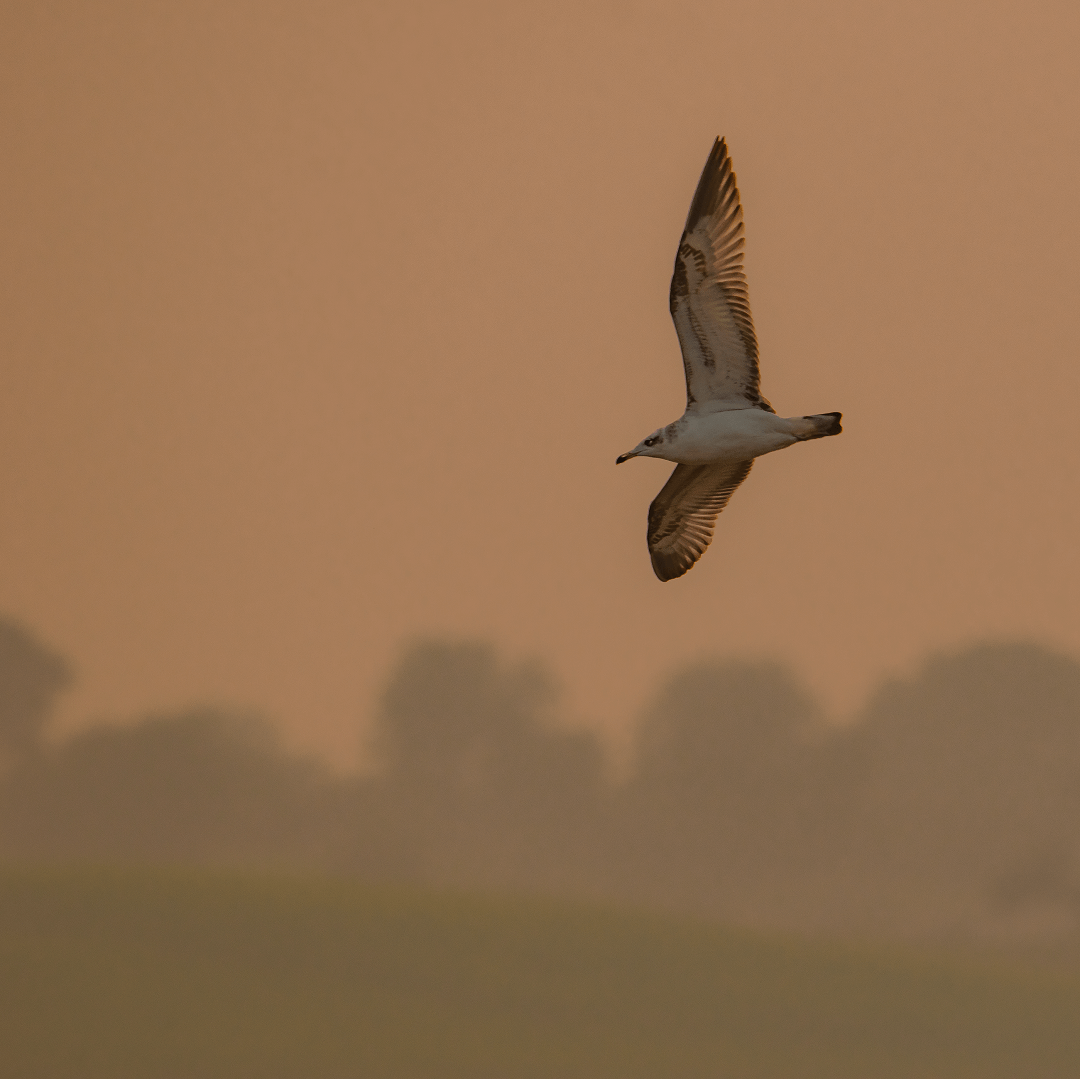
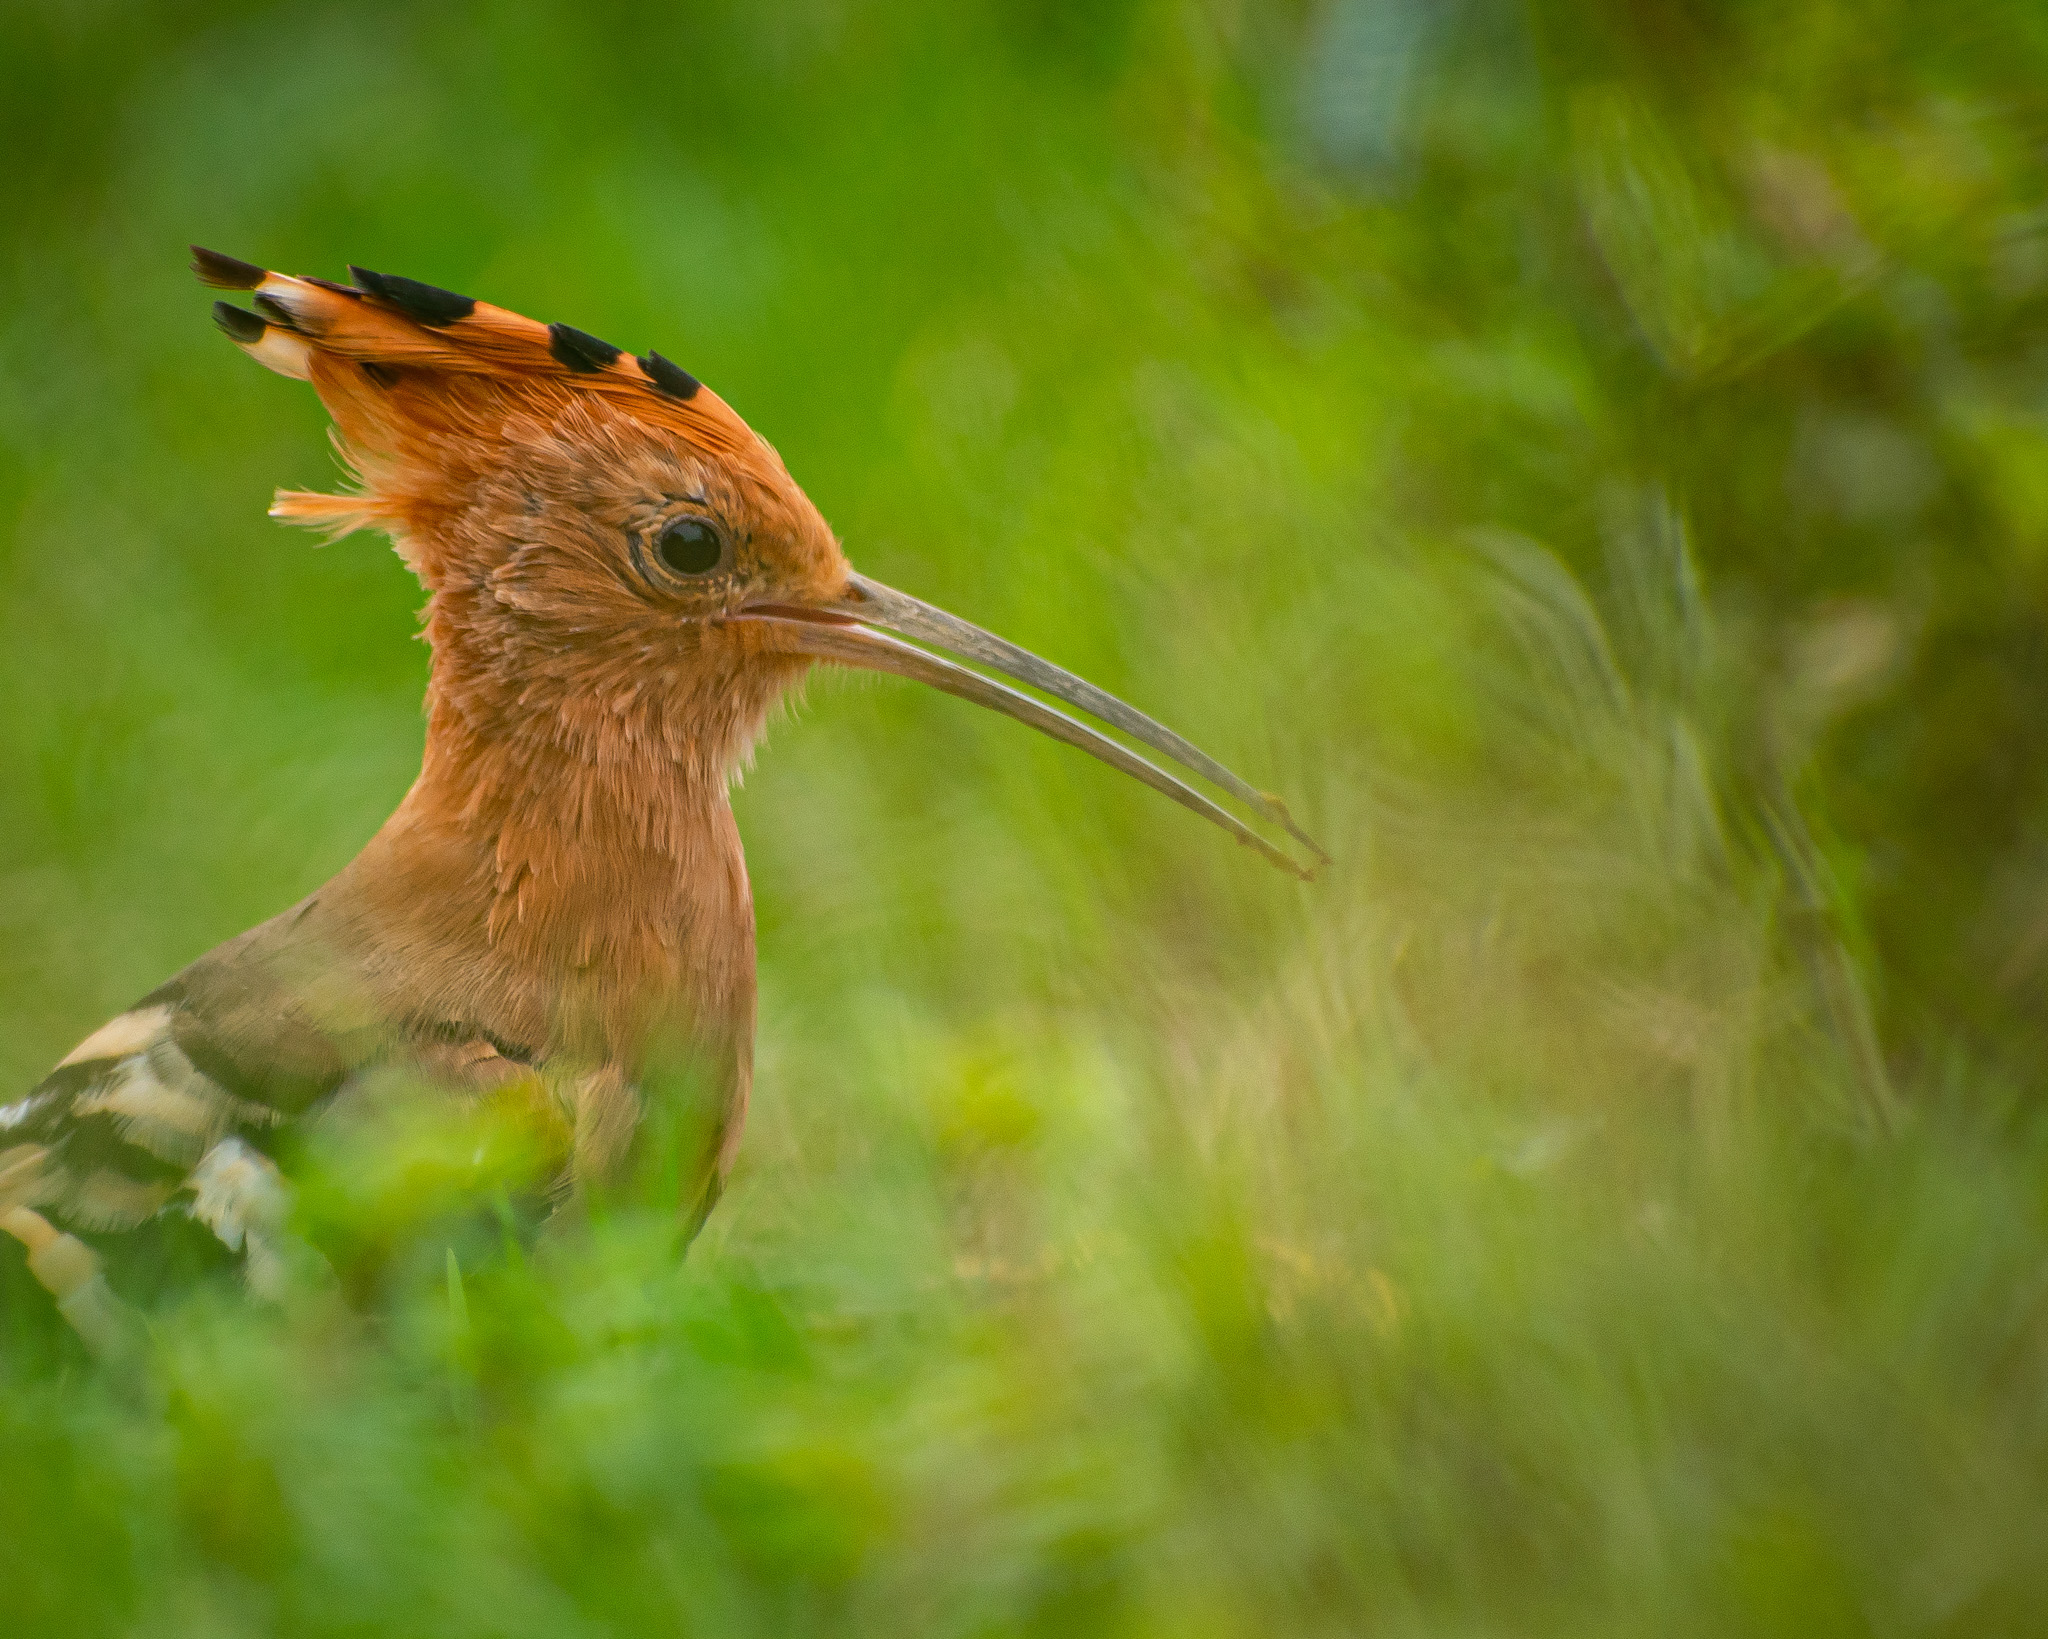
Image Credit: Avinash.wildlife, Camera settings: 1/500 seconds, f/8, ISO 100. - Look for opportunities where the bird makes eye contact with the camera. This makes the image visually much more engaging.

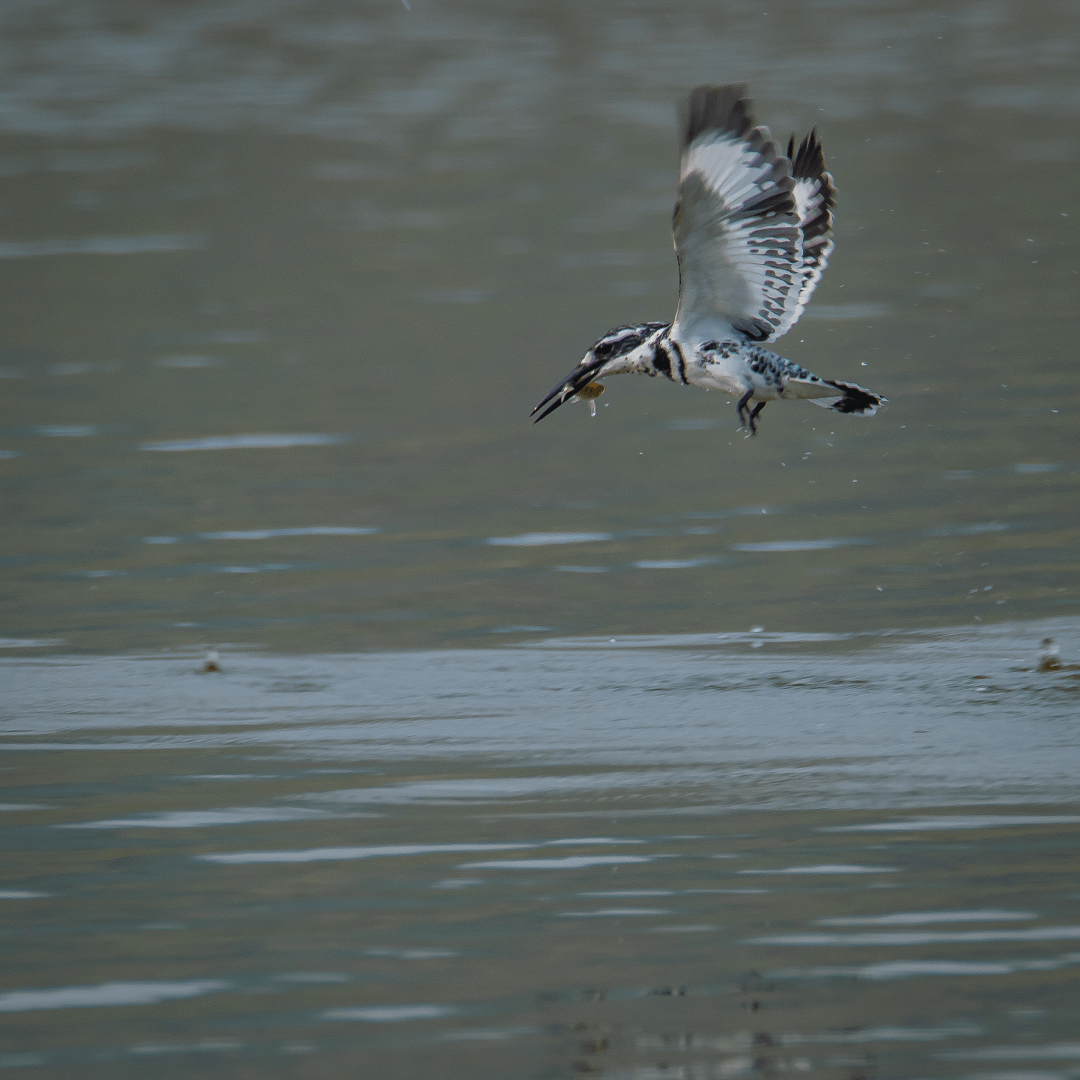
Image Credit: Avinash.wildlife, Camera settings: 1/800 seconds, f/8, ISO 200. - Aim to photograph birds in flight with their habitat included in the background. This gives some indication of their surroundings and habitat. Moreover, such a background makes the overall image much more visually appealing.
Conclusion:
My bottom line is practice, practice, practice. Start off with something large and slow, and work your way down to smaller faster birds. Smooth panning will often be the key factor in increasing your success rates, so the more time you spend improving your ability to track birds in the viewfinder, the better your flight shots will become.
These are my experiences and tips for you about the bird in flight. If you want to ask any questions please comment below and if you like the blog please share on social media.
7 Comments
Pingback:WEEKLY FEATURE (15-March 21-March 2021): Bird in Flight - Wild Tripod
Pingback:Bird Action: Top 5 Photos of the Week 2021 - Wild Tripod
Pingback:Flying Birds: Top 5 Photos of the Week - Wild Tripod
Funtasticly explained tutorial, keep up the good work
Funtastic explanation, please write a article about bird photography editing
Great tutorial sir!
And I’ll definitely try these tips
Pingback:5 Common Post Processing Mistakes You should Avoid in Bird Photography - Wild Tripod